Strength Training After 40: Why It’s One of the Best Things You Can Do for Your Health
If you’re over 40, you’ve probably noticed that your body doesn’t respond to exercise quite the same way it did 20 years ago.
Maybe you’ve lost some strength.
Your joints feel a little stiffer.
It takes longer to recover.
Or activities that used to feel easy—carrying groceries, working in the yard, climbing stairs, or getting up from the floor—require a little more effort than they once did.
That’s a normal part of getting older.
But losing your strength and becoming less capable doesn’t have to be.
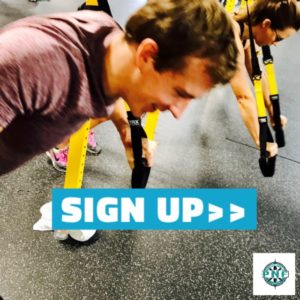
In fact, one of the most important things you can do for your health after 40 is strength training.
And no, that doesn’t mean you need to become a bodybuilder, lift enormous weights, or spend two hours a day in the gym.
It simply means training your body to stay strong enough to keep doing the things you enjoy.
Why Do We Lose Strength as We Age?
As we get older, we naturally begin to lose muscle mass and strength.
The process can begin as early as our 30s and tends to become more noticeable as we move through our 40s, 50s, 60s, and beyond.
Unfortunately, many adults unintentionally accelerate this process.
We sit more.
We become less active.
Old injuries begin to bother us.
Our schedules get busier.
And many people gradually stop doing activities that challenge their muscles.
The result is a slow loss of strength that can happen so gradually you barely notice it.
Until one day you do.
Maybe getting off the floor feels harder.
You struggle to lift something into the trunk of your car.
Your knees bother you when you climb stairs.
You feel less steady on your feet.
Or you simply don’t feel as physically capable as you used to.
This is exactly why strength training becomes increasingly important as we age.
Strength Training Helps Preserve Muscle
Muscle isn’t just about how you look.
Muscle helps you move.
It helps support your joints.
It helps you carry things.
It helps you climb stairs.
It helps you maintain your balance.
And it helps you remain physically independent.
Strength training gives your body a reason to maintain—and potentially build—muscle.
Think of it this way:
Your body is very good at adapting to what you ask it to do.
If you rarely challenge your muscles, your body has very little reason to maintain them.
But when you consistently perform strength exercises, you’re sending your body a message:
“I still need this strength.”
That’s an important message to send as you get older.
Strength Training Can Make Everyday Life Easier
One of the biggest mistakes people make when thinking about exercise is only focusing on calories and weight loss.
Exercise should help improve your life outside of the gym.
A good strength training program can make everyday activities feel easier.
Carrying groceries is a form of loaded carrying.
Getting out of a chair requires leg strength.
Climbing stairs requires strength and balance.
Lifting a suitcase requires upper and lower body strength.
Gardening requires mobility, strength, and the ability to get up and down from the ground.
Golf, pickleball, hiking, traveling, and playing with your grandchildren all require physical capacity.
The stronger and more capable your body is, the easier many of these activities become.
That’s the real goal of fitness after 40.
Not simply surviving a workout.
Building a body that helps you enjoy your life.
Strength Training Is Important for Your Bones
Bone health becomes increasingly important as we age, especially for women after menopause.
Your bones respond to physical stress.
Strength training places an appropriate amount of stress on the body, which can help support bone health when performed safely and consistently.
This is especially important for adults concerned about osteopenia or osteoporosis.
However, exercise selection matters.
Someone with low bone density may need a different program than someone without any medical or orthopedic concerns.
This is one of the reasons we believe exercise programs should be personalized—especially after 40.
The goal isn’t simply to give everyone the same workout.
The goal is to choose exercises that are appropriate for the individual.
Strength Training Can Help Improve Balance and Reduce Fall Risk
Falls become a greater concern as we age.
While balance exercises can certainly be helpful, balance isn’t only about standing on one leg.
Strength matters too.
Strong legs help you control your body.
Strong hips help provide stability.
A strong core helps you maintain position and react to movement.
And strength can help you recover when you stumble or lose your balance.
A well-designed fitness program for adults over 40 should include a combination of strength, balance, mobility, and appropriate conditioning.
These qualities work together.
You Don’t Need to Lift Extremely Heavy Weights
One of the biggest misconceptions about strength training is that you have to lift extremely heavy weights.
You don’t.
You simply need to appropriately challenge your muscles.
For one person, that may mean performing a squat while holding a dumbbell.
For someone else, it may mean learning how to safely sit down and stand up from a bench.
Another person may be ready to deadlift a barbell.
All three people are strength training.
The exercise should meet you where you are today.
As you become stronger, the program should gradually progress.
That’s where good coaching becomes important.
Your Workout Should Be Designed Around You
No two people over 40 have the same body.
One person may have arthritis.
Another may have had shoulder surgery.
Someone else may be dealing with knee pain.
Another person may be concerned about bone density.
Some people haven’t exercised in 20 years.
Others have been active their entire lives.
So why would everyone be expected to perform the exact same workout?
At Pittsburgh North Fitness, we believe your exercise program should be based on your goals, your abilities, your exercise experience, and any limitations you may have.
That’s one of the biggest differences between a fitness class and personalized coaching.
In a typical fitness class, the workout is written first.
Then everyone in the room is asked to perform some version of that workout.
With personalized training, we start with the person.
Then we design the workout.
That’s an important distinction—especially after 40.
Is It Too Late to Start Strength Training?
Absolutely not.
We regularly work with adults in their 40s, 50s, 60s, and 70s.
Many haven’t exercised consistently in years.
Some have never strength trained before.
You don’t need to “get in shape” before starting.
You don’t need to lose weight first.
And you don’t need to already know how to use gym equipment.
That’s what coaching is for.
A good fitness program should start at your current ability level and gradually help you improve.
The hardest part for many people is simply getting started.
How Often Should You Strength Train After 40?
For many adults, strength training two to three times per week can be a great place to start.
More isn’t always better.
Consistency is more important than trying to exercise every day for three weeks and then quitting because you’re exhausted or sore.
Your workouts should fit into your life.
They should challenge you without destroying you.
And you should be able to recover between training sessions.
The goal is to build a routine you can maintain for years—not just until your next vacation.
Fitness After 40 Should Be About Your Future
It’s easy to think about fitness in terms of the next 30 days.
Losing ten pounds.
Fitting into a smaller pair of jeans.
Getting ready for vacation.
There’s nothing wrong with those goals.
But there’s a bigger reason to exercise.
Think about what you want your life to look like ten, twenty, or even thirty years from now.
Do you want to travel?
Golf?
Play pickleball?
Work in your garden?
Hike?
Play with your grandchildren?
Live independently?
Your ability to do those things will depend, at least partially, on your physical capacity.
Strength training is an investment in that future.
Looking for Personal Training After 40 in the Wexford Area?
At Pittsburgh North Fitness, we specialize in helping adults over 40 become stronger, move better, and continue doing the things they enjoy.
We aren’t a large, crowded gym.
We don’t offer one-size-fits-all bootcamp workouts.
And you don’t need to already be in shape to start.
Every member begins with a Starting Point Session so we can learn about your goals, exercise experience, and individual needs.
From there, we design a personalized exercise program and coach you through the process.
If you’re looking for personal training or semi-private personal training in Wexford, PA, we’d love to meet you.
Schedule a Meet & Greet Session to learn more about Pittsburgh North Fitness and see if we’re the right fit for you.
Because getting older is mandatory.
Getting weaker doesn’t have to be.